
 Tweet
Tweet
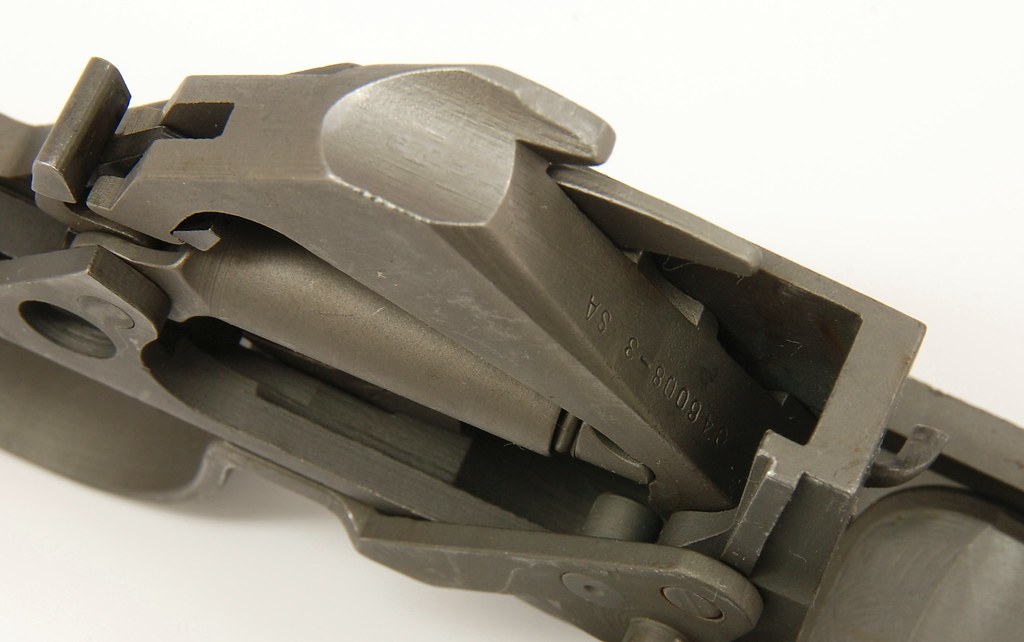
When I purchased my M1, before even shooting it, I took a bunch of pictures. I then posted them here for fun. In that thread I got a bunch of feedback that people really enjoyed the photos and would appreciate knowing what tricks & tips I used to take such great pictures.
This post is intended to provide what I know.
I have to say, however, that I don't consider myself an expert or a pro. I do take a lot of pictures, and I'm constantly trying to learn new techniques and get better, but I really am a rank amateur.
The tips I'm posting here are really about taking close up (macro) photos of smallish objects such as guns, gun parts, or toys. I learned these techniques two ways
1) From others on the Internet.
2) By trying different things and seeing what worked and what didn't.
I'll start this discussion with some comments about this second point: When I decided I wanted to get good at taking pictures of guns I took _hundreds_ of photos. Each batch of 4 or 5 shots required a round trip from my camera (pulling the memory card out) to my PC where I opened the images and played with touch-up software. Then back to the camera to change some setting or lighting arrangement for 4 or 5 more shots. Over and over until I found a formula that looked good.
I think if you want to get consistent you'll have to invest this time.
Equipment:
I happen to have pretty good equipment camera equipment. A Nikon D80 with a 18-200mm DX VR lens is a $1700 investment. However it's not _great_ equipment. A D300 camera body is $2500 alone!
_However_, I happen to know that you do NOT NEED even "pretty good" equipment to take great shots like I've taken. Your pictures may lack some sharpness and you may struggle more getting just the right settings, but a good consumer grade digital camera will take _great_ macro pictures if you use the right technique.
Tips & Techniques
Lighting. For macro photography lighting is _critical_. I think it is the far MOST IMPORTANT aspect. You need LOTS of indirect, reflected light from multiple directions. There are a lot of ways of accomplishing this; I choose a "light box". This is a white box that has rounded corners that the lights are shined on. There is a roof and adjustable panels. Use Bing to find how to build your own light box.
A tripod. Sharp pictures require a perfectly still camera. Get a stable tripod for your camera. Make sure the table or whatever you put the gun on is also solid and free of vibrations. The movement of the mirror getting out of the way in a SLR can cause vibrations that will impact the sharpness of the photo! To avoid even this most cameras have a setting that will move the mirror out of the way and THEN activate the shutter. In all cases you MUST use either a timer or remote control so that when you press the shutter button you don't disturb the camera.
Long exposures. Set your aperture to one or two stops below the maximum for your lens (in my case the max is f/22 so I chose f/20) and adjust your exposure as long as possible to get a shot that is not over exposed. For these shots the shutter stayed open for 1.3 to 1.6 seconds. The long exposure/small aperture lets you get a deeper depth of field meaning more of the object will be in focus.
Color. Adjust the white balance/color temperature on your camera for the best color. Frankly, this is where I am still struggling & learning. I just know it's important and some of my photos look far better than others :-). I think I did an OK good job on the M1 photos (on the first picture on this post, note how the white background matches the white background of this page? If you don't get the white balance and color temperature right that white ends up looking pink or blue or yellow...yuk!).
Post Production. Use an image editing software package to touch up your photographs. This can help immensely in adjusting the color to look more natural and to crop the photos.
I also _always_ use the "Unsharp Mask" feature that most of these software packages have to sharpen the photos further. On gun photos this makes a HUGE difference in making details like serial numbers "pop".
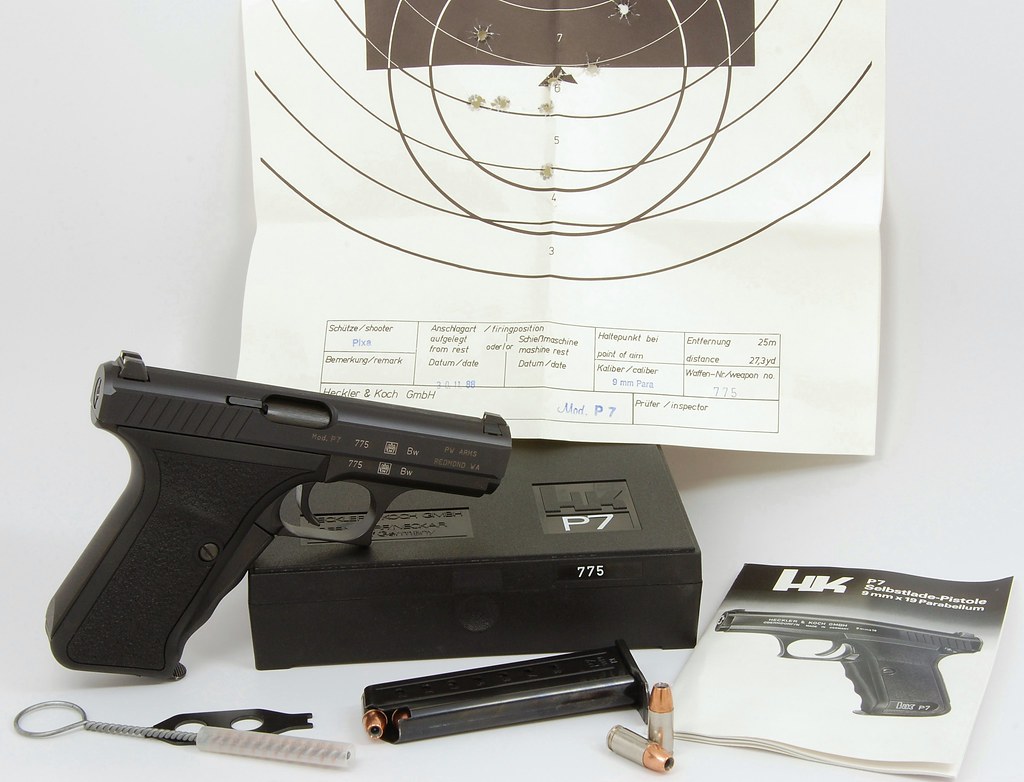
Speaking of serial numbers. For my non-antique guns I don't want my serial numbers on the Internet. So I edit them out. Notice on the HK P7 photo above how the serial number clearly ain't "right" on both the gun and the paper? I simply "deleted" a few digits.
I use Microsoft Digital Image Pro 2006 which, unfortunately is discontinued (but still available if you look). I find it very easy to use (unlike Photoshop which has always felt like it was built for Klingons to me). I hear Lightroom is good too. For free, the Windows Live Photo Gallery included in the Windows Live Essentials package does the basics _really_ well (and is actually based on the same graphics engine of Digital Image Pro).
Camera Settings
I use a Nikon D80 digital SLR with (my wife's!) 18-200mm DX/VR lens. I set the shutter speed and aperture manually and turn off auto-focus so I can manually focus. It takes a lot of patience and trial and error to get it right. It's sometimes hard to tell through the tiny viewfinder of the camera whether the focus is right so a round trip to the computer is often needed.
Staging Objects
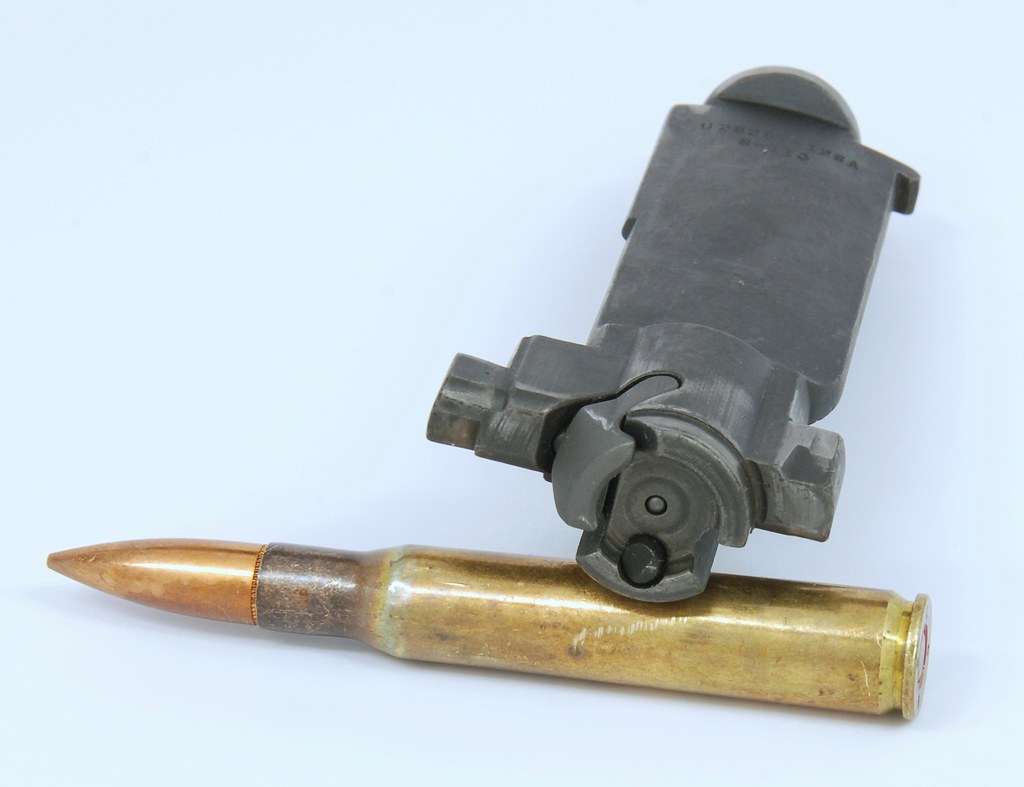
I'm still trying to find a good way to prop up pistols and small parts. You can see two examples where I accomplished it naturally above. I've also tried building a rig for holding pistols via the barrel.
But you really want to experiment with different angles. I have found that the MORE LIGHT from MULTIPLE DIRECTIONS allows for the greatest flexibility.
That's all for now. Maybe others can chime in with their own tips or questions.
This post is intended to provide what I know.
I have to say, however, that I don't consider myself an expert or a pro. I do take a lot of pictures, and I'm constantly trying to learn new techniques and get better, but I really am a rank amateur.
The tips I'm posting here are really about taking close up (macro) photos of smallish objects such as guns, gun parts, or toys. I learned these techniques two ways
1) From others on the Internet.
2) By trying different things and seeing what worked and what didn't.
I'll start this discussion with some comments about this second point: When I decided I wanted to get good at taking pictures of guns I took _hundreds_ of photos. Each batch of 4 or 5 shots required a round trip from my camera (pulling the memory card out) to my PC where I opened the images and played with touch-up software. Then back to the camera to change some setting or lighting arrangement for 4 or 5 more shots. Over and over until I found a formula that looked good.
I think if you want to get consistent you'll have to invest this time.
Equipment:
I happen to have pretty good equipment camera equipment. A Nikon D80 with a 18-200mm DX VR lens is a $1700 investment. However it's not _great_ equipment. A D300 camera body is $2500 alone!
_However_, I happen to know that you do NOT NEED even "pretty good" equipment to take great shots like I've taken. Your pictures may lack some sharpness and you may struggle more getting just the right settings, but a good consumer grade digital camera will take _great_ macro pictures if you use the right technique.
Tips & Techniques
Lighting. For macro photography lighting is _critical_. I think it is the far MOST IMPORTANT aspect. You need LOTS of indirect, reflected light from multiple directions. There are a lot of ways of accomplishing this; I choose a "light box". This is a white box that has rounded corners that the lights are shined on. There is a roof and adjustable panels. Use Bing to find how to build your own light box.
A tripod. Sharp pictures require a perfectly still camera. Get a stable tripod for your camera. Make sure the table or whatever you put the gun on is also solid and free of vibrations. The movement of the mirror getting out of the way in a SLR can cause vibrations that will impact the sharpness of the photo! To avoid even this most cameras have a setting that will move the mirror out of the way and THEN activate the shutter. In all cases you MUST use either a timer or remote control so that when you press the shutter button you don't disturb the camera.
Long exposures. Set your aperture to one or two stops below the maximum for your lens (in my case the max is f/22 so I chose f/20) and adjust your exposure as long as possible to get a shot that is not over exposed. For these shots the shutter stayed open for 1.3 to 1.6 seconds. The long exposure/small aperture lets you get a deeper depth of field meaning more of the object will be in focus.
Color. Adjust the white balance/color temperature on your camera for the best color. Frankly, this is where I am still struggling & learning. I just know it's important and some of my photos look far better than others :-). I think I did an OK good job on the M1 photos (on the first picture on this post, note how the white background matches the white background of this page? If you don't get the white balance and color temperature right that white ends up looking pink or blue or yellow...yuk!).
Post Production. Use an image editing software package to touch up your photographs. This can help immensely in adjusting the color to look more natural and to crop the photos.
I also _always_ use the "Unsharp Mask" feature that most of these software packages have to sharpen the photos further. On gun photos this makes a HUGE difference in making details like serial numbers "pop".
Speaking of serial numbers. For my non-antique guns I don't want my serial numbers on the Internet. So I edit them out. Notice on the HK P7 photo above how the serial number clearly ain't "right" on both the gun and the paper? I simply "deleted" a few digits.
I use Microsoft Digital Image Pro 2006 which, unfortunately is discontinued (but still available if you look). I find it very easy to use (unlike Photoshop which has always felt like it was built for Klingons to me). I hear Lightroom is good too. For free, the Windows Live Photo Gallery included in the Windows Live Essentials package does the basics _really_ well (and is actually based on the same graphics engine of Digital Image Pro).
Camera Settings
I use a Nikon D80 digital SLR with (my wife's!) 18-200mm DX/VR lens. I set the shutter speed and aperture manually and turn off auto-focus so I can manually focus. It takes a lot of patience and trial and error to get it right. It's sometimes hard to tell through the tiny viewfinder of the camera whether the focus is right so a round trip to the computer is often needed.
Staging Objects
I'm still trying to find a good way to prop up pistols and small parts. You can see two examples where I accomplished it naturally above. I've also tried building a rig for holding pistols via the barrel.
But you really want to experiment with different angles. I have found that the MORE LIGHT from MULTIPLE DIRECTIONS allows for the greatest flexibility.
That's all for now. Maybe others can chime in with their own tips or questions.


Comment