
 Tweet
Tweet
Nice , you spend alot more time making it look all straight and purrrty than I do
-
"I am the master of my unspoken words, and a slave to those that should have remained unspoken. ... -
These pictures are great, and they definitely make me feel better. Thanks so much for posting!
My work isn't as clean as yours — this is my first foray into stock fitting — but at least I did the work in the same places you did.
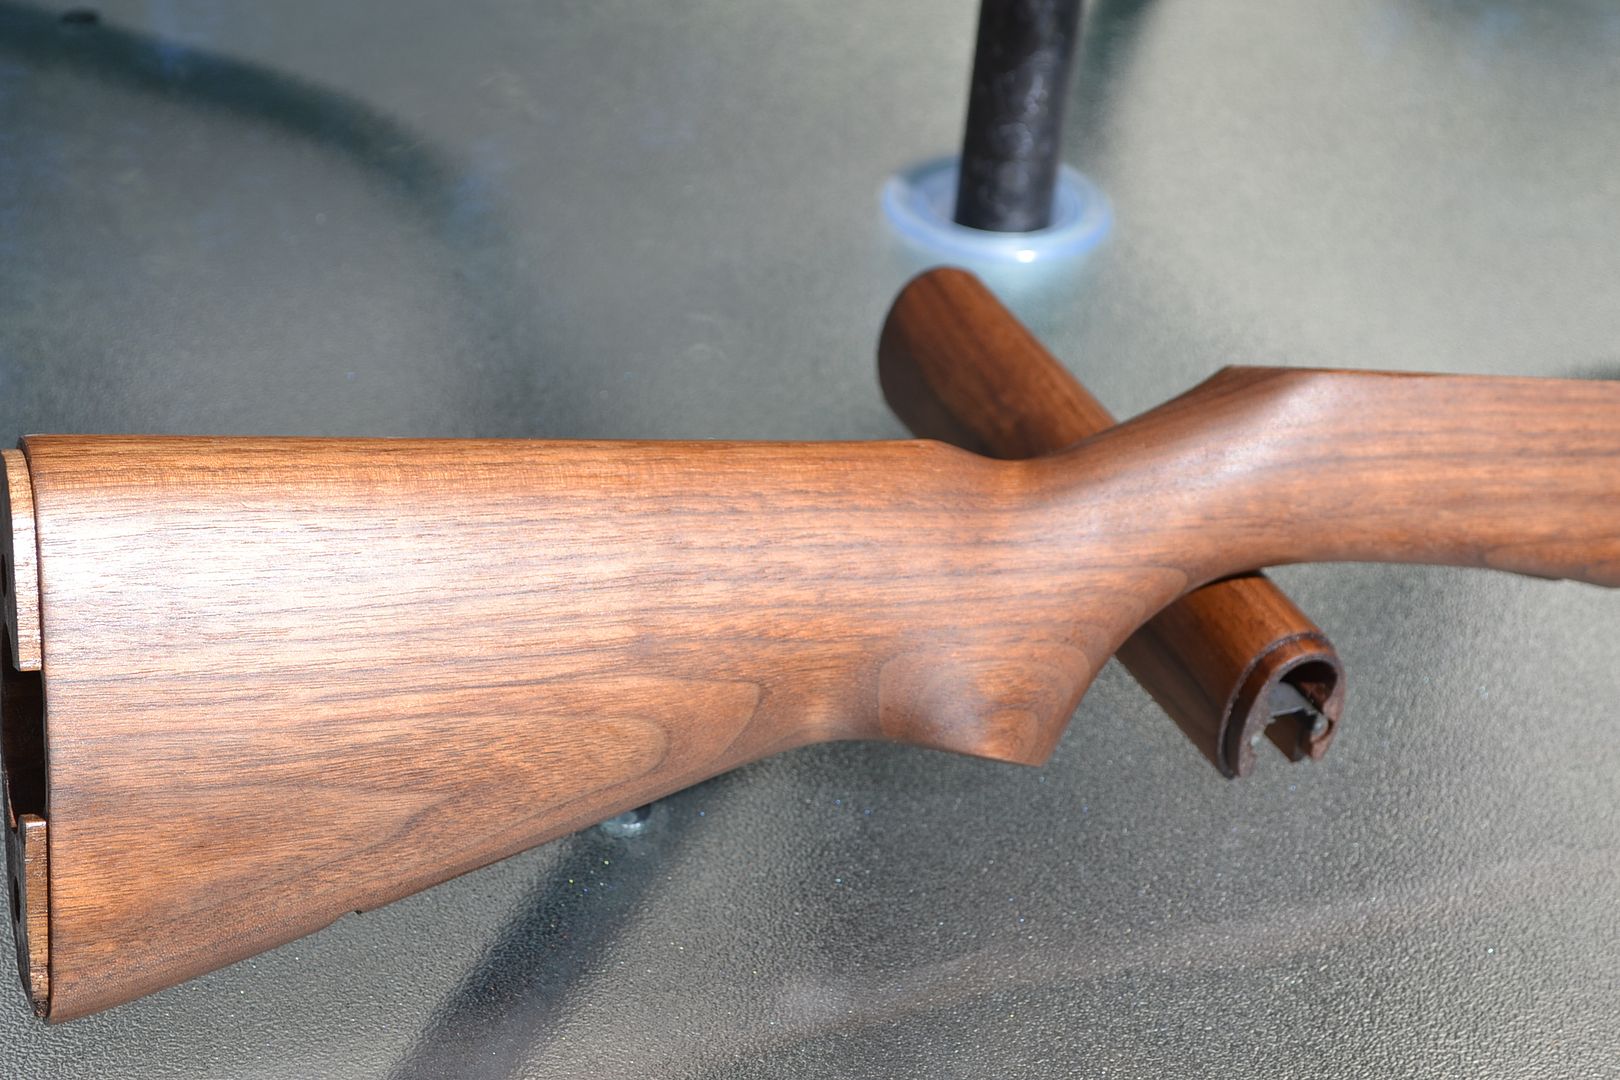
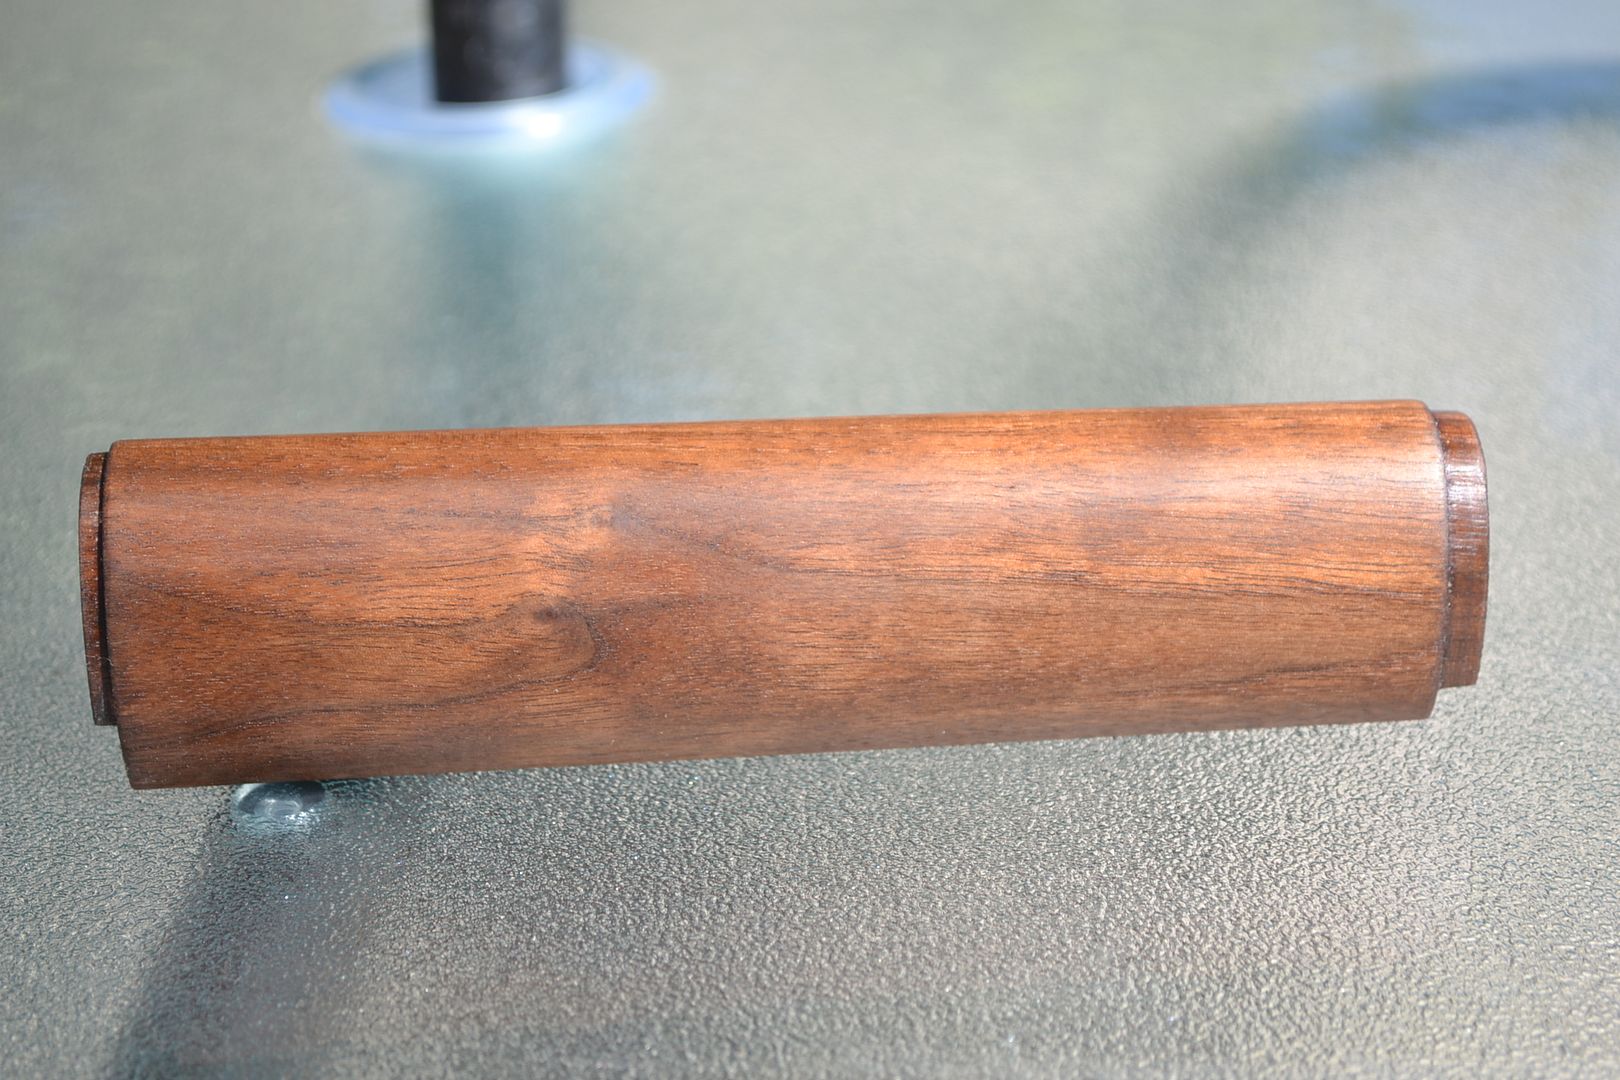
Levisdad, Do the relief cuts on the barrel channel have to be symmetrical? As they are now, I can easily slip a dollar bill between the barrel and the stock, but the amount of wood removed is not the same on both sides because I didn't end up clearing out as much wood from the left side of the barrel channel as I did the right.
I had to clear out more on the right because, when I rubbed some grease on the op-rod to see where it was binding, it seemed to rub a little there, hence the more aggressive treatment. I didn't make them symmetrical because I figured that, since the barrel already seemed to have plenty of clearance according to the dollar bill test, why bother? However, I'll be the first to admit I could have been wrong! Photo below. The left top edge of the stock is lighter because I had to sand it a lot to open up some clearance between it and the bottom of the rear handguard.
<a href="http://s962.photobucket.com/albums/ae101/BenjaminWP/?action=view&current=DSC_0011.jpg" target="_blank"><img src="http://i962.photobucket.com/albums/ae101/BenjaminWP/DSC_0011.jpg" border="0" alt="Photobucket"></a>[IMG]
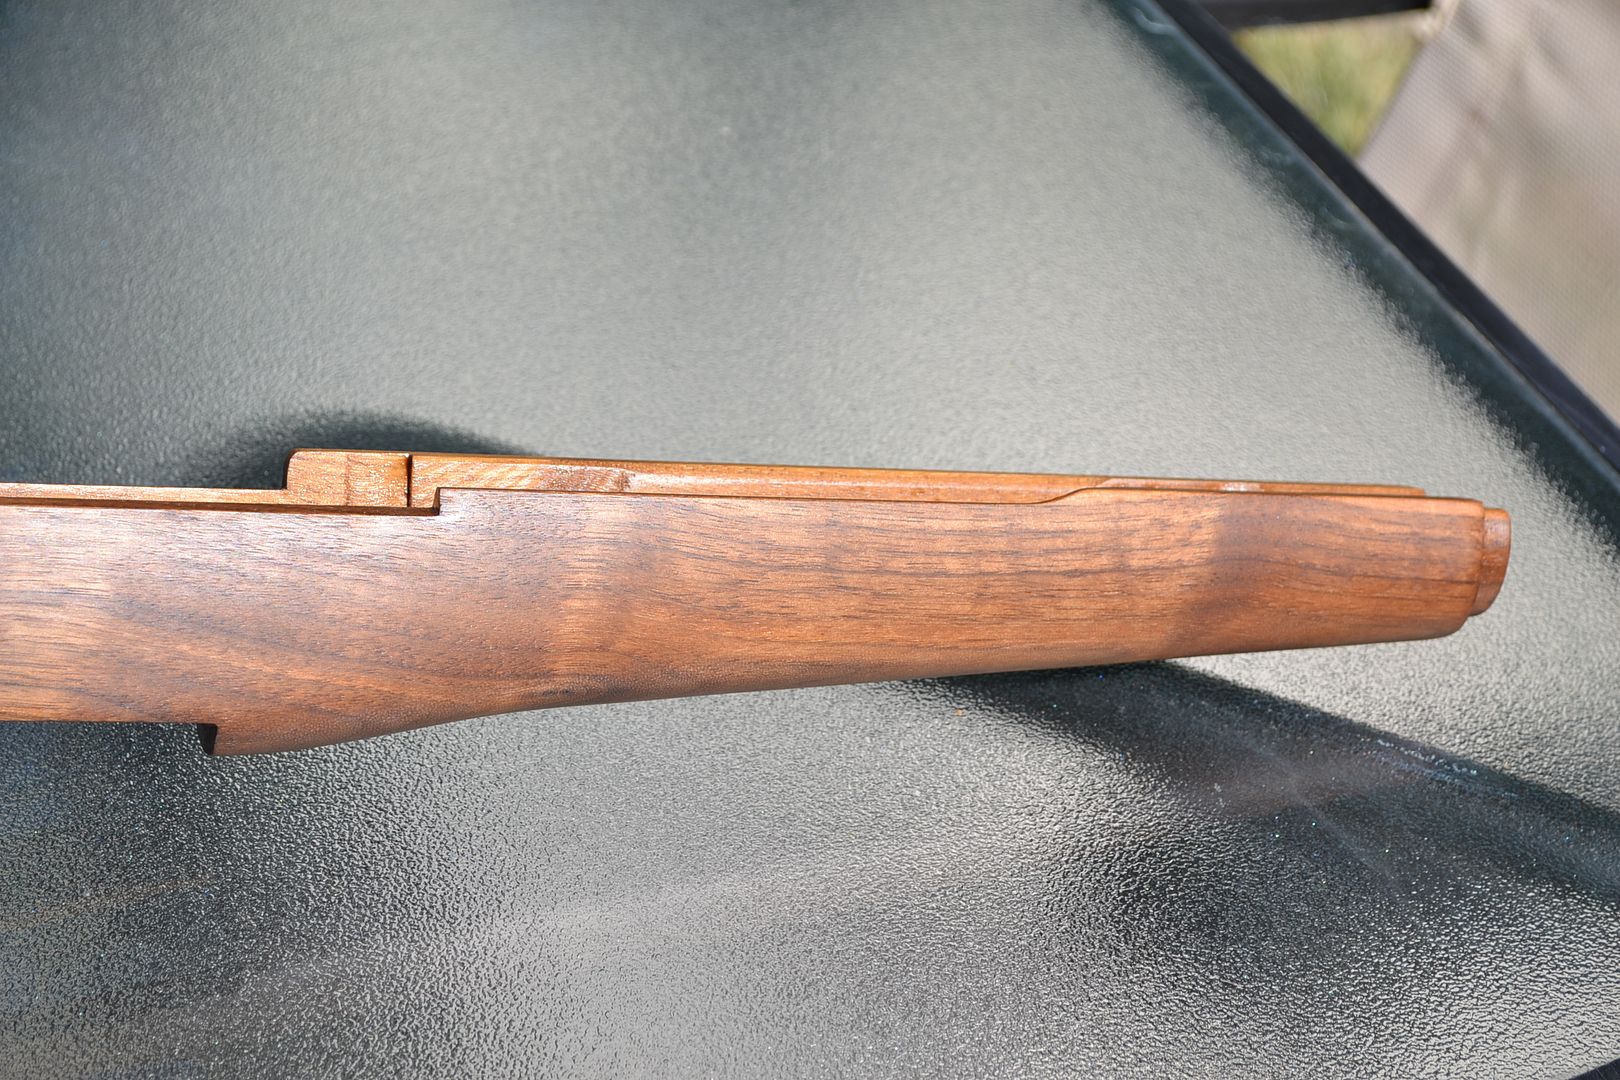
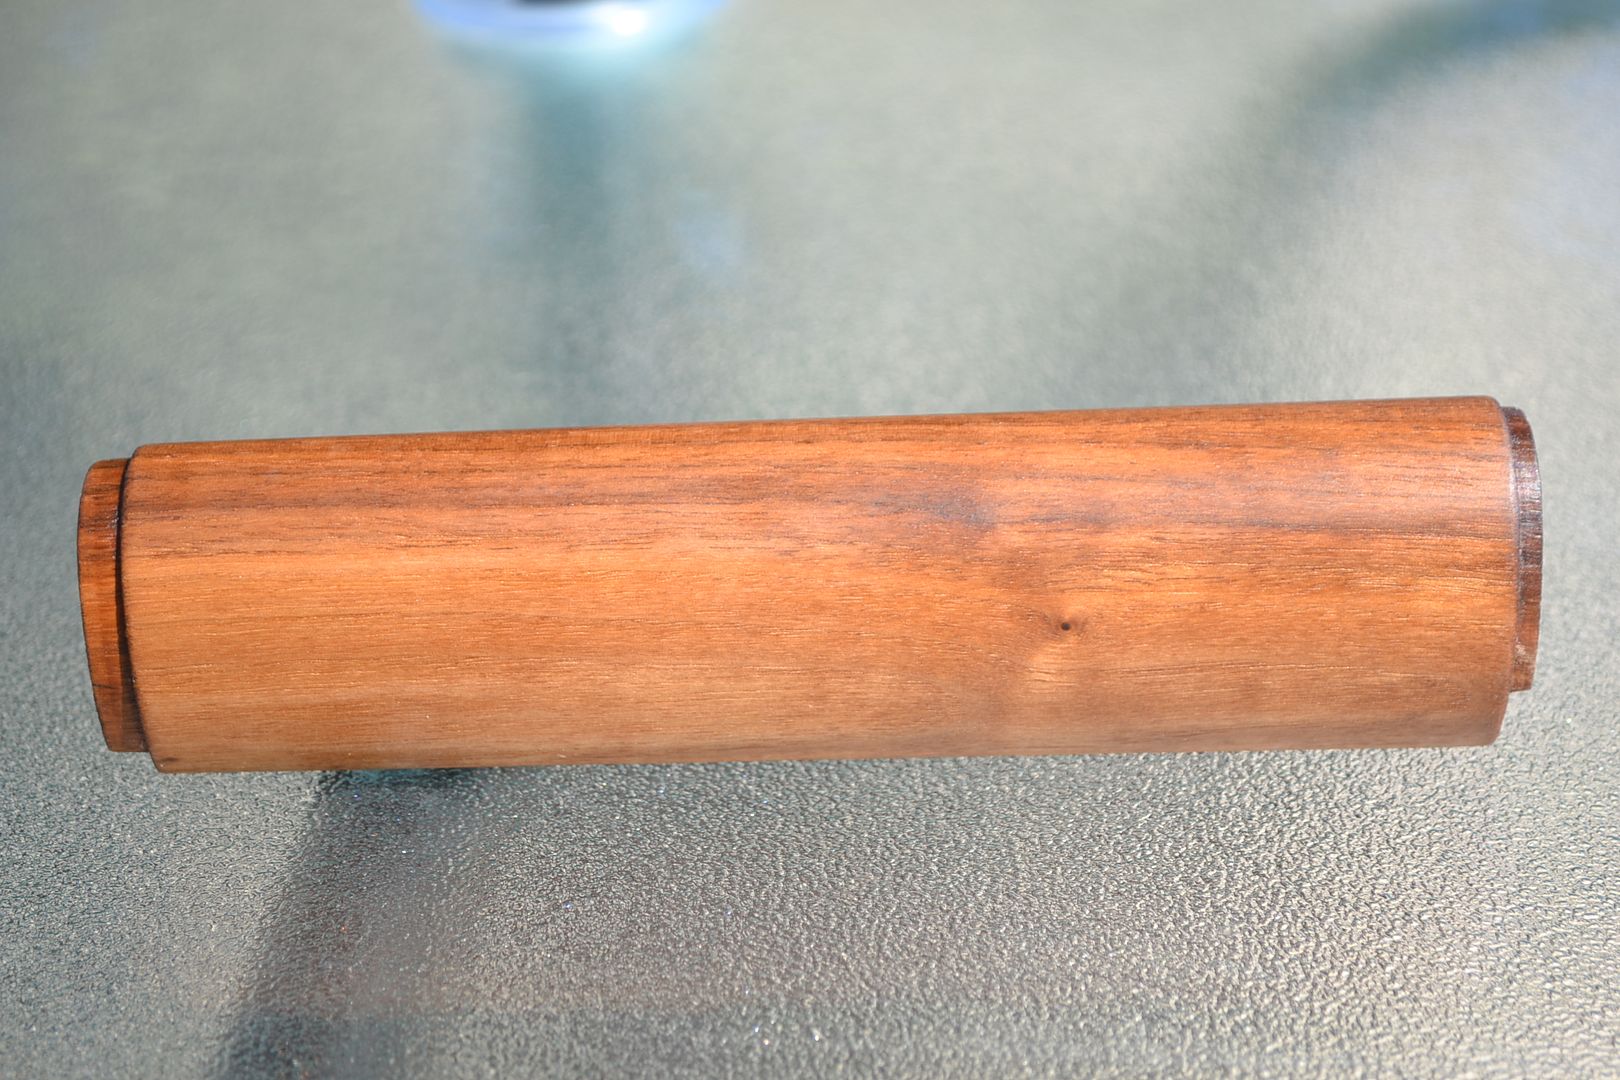
I'm including a photo of my work creating the gap between the receiver top bottom and top of the stock because I didn't sand all the way to that edge where the top edge of the stock drops down slightly and the interior of the stock widens into the cuts for the receiver legs. I stopped slightly before that. Should I sand to those edges or is this fine as it is?
[IMG]<a href="http://s962.photobucket.com/albums/ae101/BenjaminWP/?action=view&current=DSC_0006.jpg" target="_blank"><img src="http://i962.photobucket.com/albums/ae101/BenjaminWP/DSC_0006.jpg" border="0" alt="Photobucket"></a>[/IMG]Comment
-
Looks good to go. As long as you got some clearance in the right places it don't matter how it looks cosmetically or if it's symetrical.Comment
-
Odd that nobody mentioned this before but.........my recently arrived stock, {July14th} from Dupage is actually a Boyd's product! I suppose it's the thin stock type that Dupage mentions that there stocks are. It still needs a ton of work regardless!! All three pieces are stamped Boyd's! Kinda like buying a Cadillac with a Chevy motor!Comment
-
I like to have approx 1/8 inch clearance under the barrel in the barrel channel. The barrel will flex when fired and you want plenty of space under it"I am the master of my unspoken words, and a slave to those that should have remained unspoken. ...Comment
-
That's never been a secret, AFAIK. The first time I ever heard of Dupage, it was mentioned that they were reworked stocks that Boyds had made.Originally posted by lee sherman View PostComment
-
Orlando,
I have the problem of the stock ferrule being too high on a CMP Orange Birch Stock. I haven't worked on it yet nor have I looked at it much either, but plan to soon. I sometimes wonder if the problem isn't the placement of the stock ferrule, but rather the receiver leg cuts in the stock and how they locate the receiver and barrel in relation to the stock ferrule. Any thoughts on that?
DannyComment
-
Only time I messed with the ferrule is when it set to high in the barrel channel itself"I am the master of my unspoken words, and a slave to those that should have remained unspoken. ...Comment
-
I can't really be sure what the cause of the problem is that I'm seeing, so I haven't worked with the stock yet. The problem is that the lower band and stock ferrule engagement surfaces are not engaging. The stock ferrule is too high up in the opening, or the lower band is too low in relation to the stock ferrule. I think that I will start to work with it again after the National Matches.Originally posted by Orlando View Post
DannyComment
-
I have a question about the ferrule that goes on the front of the stock, the one the sling swivel is on. Do those normally have enough "give" so that you can back the screw out enough to allow the ferrule to open up a little, so that it can "clamp" itself in place when you tighten the screw back down?
On mine, I can barely back the screw off 1 turn, if even that much, the ferrule is at "full squeeze" and won't loosen up. I had to remove it by tapping it off with a hammer and punch. I have a new one on the way from FLASHOOTER, just haven't received it yet.
I ask because my new stock is certainly too big where that thing needs to mount, and I don't want to work the stock down too much there. Ain't touching it until the new ferrule is in my hands.Comment
-
Well, I don't have any pics yet, because mine isn't quite finished. But it's mighty close!!!
I bought the unfinished walnut WWII profile set from Dupage, which of course is made by Boyd's for Dupage. I found it to still be a little large, the wood was too proud around the buttplate and the handguard ferrules to suit me. So I got out my little block plane and started shaving 'er down.
I shaved down the sides of the buttstock to just a tad larger than the buttplate, then beveled the edges slightly to bring them down right to the buttplate. Same with the handguards. Took off quite a bit of wood, but just a little bit at a time. Taking care to maintain the rounded contours as much as possible.
Then I sanded everything smooth and pretty with 180 grit paper and a sanding block, then sanded with 220, and rubbed in four coats of 50/50 Pure Tung Oil and Mineral Spirits. Let it dry a few days, and just tonight I gave it a good 1 hour soaking with Fairtrimmers, which I burnished into the wood with a worn-out piece of 600 grit wet/dry sandpaper.
The four coats of tung oil gave the walnut a beautiful honey brown color, but I wanted to add just a little of the red "warmth" so I topped it off with the Fairtrimmers. The Tung oil slowed down the absorption of the Fairtrimmers enough that the change in color was very slight, but just noticeable. It's not real dark like Fairtrimmers on raw walnut would look, but I think it's very pleasing. At least to me. It doesn't have that deep brown reddish military look, I wanted to still see the grain of the wood.
I can't wait for it to cure a few days so I can apply a coat of Tom's 1/3 wax and assemble the rifle! I'll take some photos then. She has the new stock, a new gas cylinder, all new springs, and a new triggerguard (well, used but in better shape), so I hope and pray that she'll finally shoot right and won't short-stroke anymore. I also plan to take it to Chuckindenver and have him assemble the rear sight for me, I just can't seem to get it right.Comment
-
Excellent info for re-stocking the M-1. I am presently finishing up a Dupage re-stock project myself. I learned much in regard to M-1's and the in's and out's of a re-stock project. There is more to it than meets the eye. Total fitment of metal, tilt test corrections, etc. The CMP members have been most helpful with this stock upgrade. They all deserve much praise! LSComment
-
I'm sure I'll have some final fitment trimming to do, but that'll be easy to touch up. I just wanted to get the exterior of the stock oiled and sealed before I got greasy fingerprints on the raw wood from handling the action parts and fitting them. That was my plan anyway.
<EDIT>I couldn't wait, had to take some photos. Sunlight makes it look a little orange, which it isn't. I'll do some more later on.


Comment
-
Reworking CMP/Dupage/Boyds Stocks
I have done my third stock of the recent production of the Boyds/CMP/DuPage stocks and found the wood is very tight against the rear vertical surface of the trigger housing.
I am using a Dremel tool to remove about 1/32" of material so the wood does not pull up when the trigger housing is removed from the stock. I slightly chipped one today, because I forgot to relieve that area. No problem to fix, but in this incident it was a tiny chip.
So anyway here is an image and hopefully this will prevent some problems for you guys.
sparx
 5
5
Comment
-
I know this is an "old" thread, but I found it extremely helpful in prepping my Boyd's stock. I received a SG SA; cleaned/lubed, took to the range, and she shot high and left with sights straight up at 50 yards. I had to crank the front sight to the left as far as it would go to get the windage even close, then would have had to use the rear sight. Something was obviously wrong. Tilt test revealed the op rod was binding everywhere on the stock, the trigger dent was present, the firing pin dent was present, the op rod wear marks on the stock and ferrule were present, and checking with a piece of paper showed the barrel must have been touching the stock when firing. I used a dremel and fine grit sanding drum to slowly blend the areas. The slight clearance between the receiver and stock was present, but VERY slight, so I touched it up just a bit with a wood block and 320 grit paper. The trigger assembly also bound on the #5 spot in Gus's photo. The front and rear handguards were okay.
Thanks for this thread.Comment


Comment